Quilting is not just about creating warmth; it’s about adding beauty and personality to our living spaces. One captivating way to achieve this is through the Starburst Pillow pattern. This design, with its radiant bursts of color and geometric precision, adds a touch of modern elegance to any room. In this article, we’ll explore how to create your own Starburst Pillow, infusing your space with charm and style.
When it comes to adding a splash of personality to your living space, few things rival the charm of a handmade pillow. Among the plethora of patterns available to quilters, the Starburst Pillow pattern stands out as a beacon of creativity and elegance. With its dynamic design reminiscent of exploding stars, this pattern offers a captivating way to infuse your home decor with celestial allure.
Embracing Geometry and Symmetry
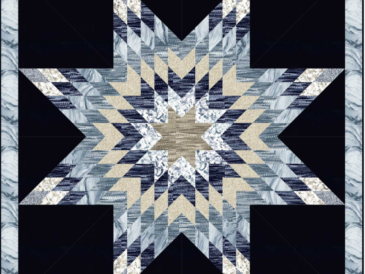
At the heart of the Starburst Pillow pattern lies a fascination with geometry and symmetry. The design typically features a central starburst motif surrounded by rays of varying lengths, creating a sense of movement and energy. Each ray extends outward from the center, culminating in a burst of color and pattern that captivates the eye.

One of the most appealing aspects of the Starburst Pillow pattern is its versatility. Quilters have the freedom to experiment with different colors, fabrics, and arrangements, allowing for endless variations on the theme. Whether you prefer bold, contrasting hues or subtle, monochromatic tones, there’s ample room for creativity within this pattern.
Mastering the Technique
While the Starburst Pillow pattern may appear intricate, it is accessible to quilters of all skill levels. The key lies in breaking down the design into manageable components and taking the process step by step.
Fabric Selection: Begin by selecting fabrics that complement one another and reflect the aesthetic you wish to achieve. Consider using a mix of solids and prints to add depth and visual interest to your design.
Cutting and Piecing: Cut fabric strips of varying widths to create the rays of the starburst. Arrange the strips in a radial pattern around a central motif, such as a square or circle. Piece the strips together, taking care to maintain symmetry and alignment.
Quilting: Once the starburst panel is assembled, layer it with batting and backing fabric for quilting. Explore different quilting techniques, such as straight-line or free-motion quilting, to enhance the texture and dimension of your pillow.
Finishing Touches: Trim any excess fabric, and then sew the front and back panels of the pillow together, leaving an opening for stuffing. Once stuffed to your desired fullness, hand-stitch the opening closed for a polished finish.

A Touch of Celestial Splendor
The Starburst Pillow pattern offers more than just a decorative accent; it invites us to ponder the wonders of the cosmos. With its radiant bursts of color and dynamic geometry, this pattern captures the essence of celestial beauty in a tangible form. Whether gracing a sofa, bed, or favorite armchair, a Starburst Pillow adds a touch of celestial splendor to any room it inhabits.


