Fusible fleece or Insul-Brite (for heat resistance)
-
1 piece for the body
-
2 pieces for the wings
Orange fabric scrap (for the beak)
Felt scraps or 3 short pieces of ribbon (for the comb)
Buttons (for eyes) or embroidery floss
Sewing thread
Basic sewing tools (scissors, pins, iron, sewing machine, needle, etc.)
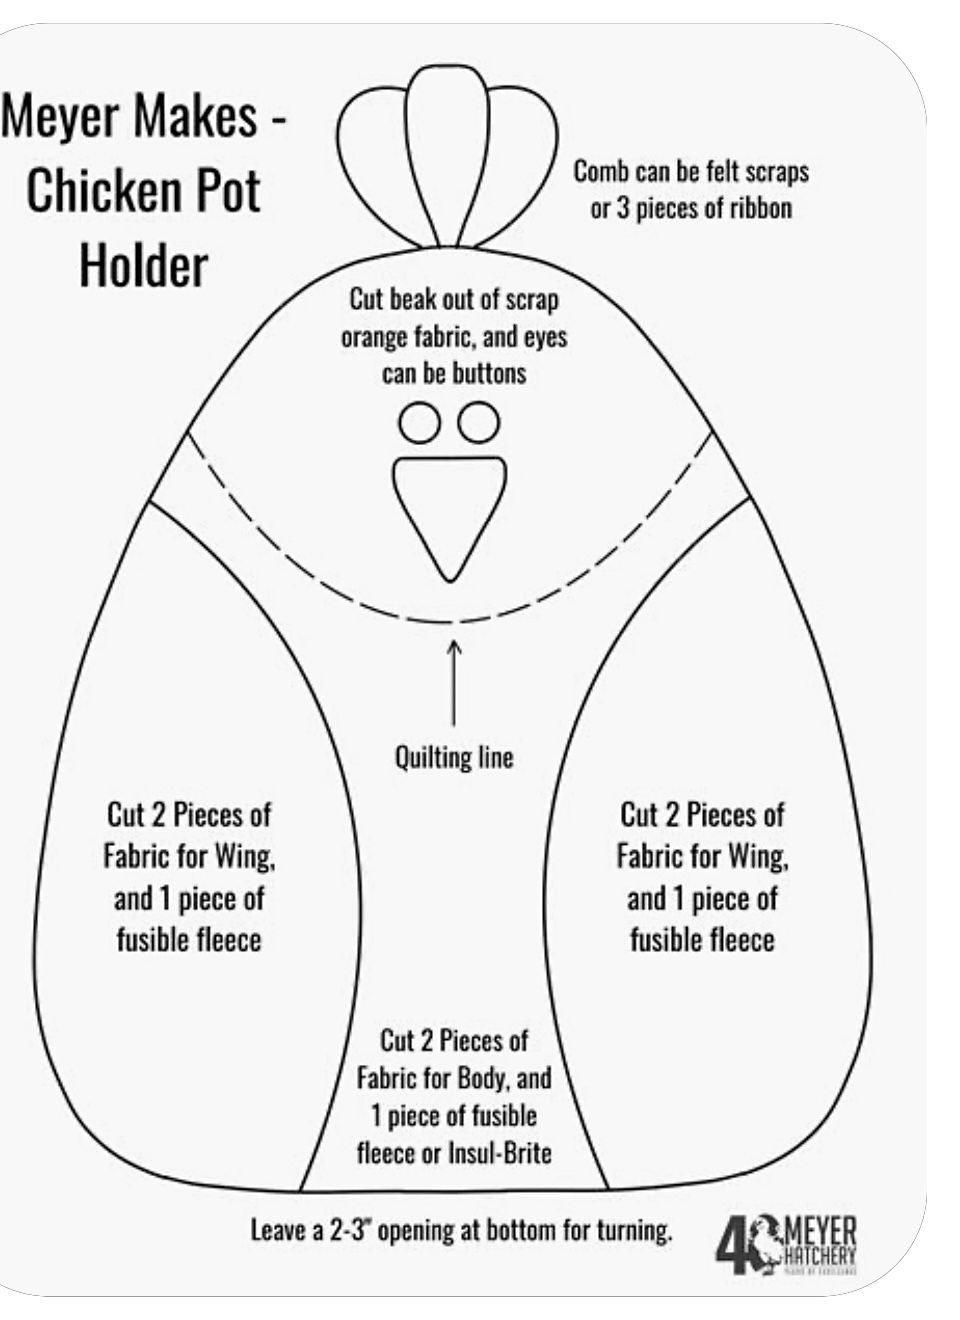
🧵 Cutting Instructions
Body:
Cut 2 pieces of fabric using the body template and 1 piece of fusible fleece or Insul-Brite.
Wings:
Cut 2 pieces of fabric for each wing (total of 4 pieces) and 1 piece of fusible fleece per wing (total of 2 pieces).
Beak:
Cut 1 small triangle from orange scrap fabric.
Eyes:
Use buttons or embroider small circles.
Comb:
Use felt scraps or 3 small ribbon loops for the comb at the top of the head.
🪡 Instructions
Prepare the Wings:
Place right sides of 2 wing fabric pieces together with 1 piece of fusible fleece on the back.
Sew around the wing, leaving a small opening.
Turn right side out, press, and topstitch if desired.
Repeat for the second wing.
Attach the Wings:
Position the finished wings on the front body piece along the dashed quilting line.
Pin or stick them in place.
You can quilt along the line to secure the wings if you’d like a quilted look.
Add Details to the Front:
Sew or glue the beak in place.
Attach the eyes (buttons or embroidered circles).
Pin the comb (ribbon or felt) between the two body layers at the top.
Assemble the Body:
Layer the pieces: back body fabric (right side up), front body piece (right side down), and the fleece/Insul-Brite on top.
Pin all around, making sure the comb is inside.
Sew all around the edge, leaving a 2–3” opening at the bottom.
Turn and Finish:
Turn the pot holder right side out.
Use the blunt tool to push out curves and points.
Press flat.
Hand-stitch the opening closed or topstitch around the edge for a neat finish.
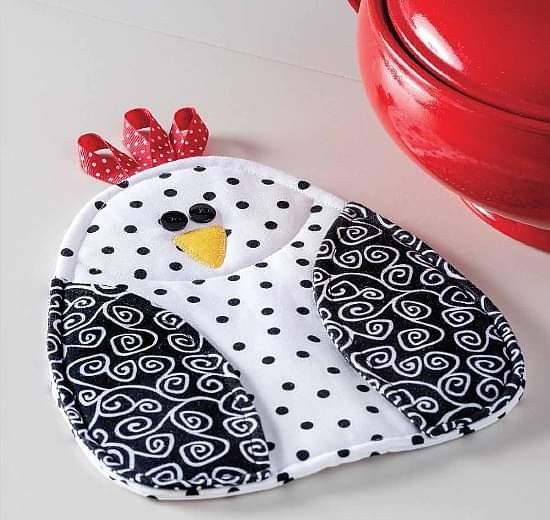
Chicken Pot Holder Tutorial
🧼 Care Instructions
Machine washable in cold water. Lay flat or tumble dry low. Do not bleach.
This fun little chicken is perfect for adding some handmade personality to your kitchen or as a gift for someone who loves cooking or chickens!