B: (8) squares – 2” x 2”
C: (8) rectangles – 2” x 3 ½”
D: (4) rectangles – 2” x 6 ½”
E: (1) square – 3 ½” x 3 ½”
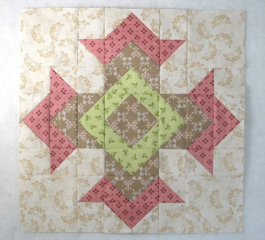
Block Assembly Instructions
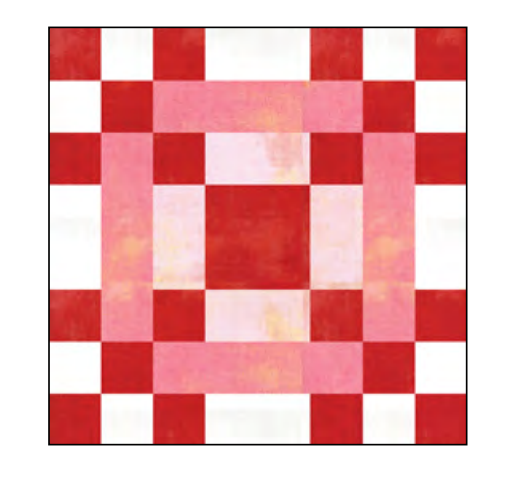
Step 1: Assemble the Block Center
Using:
-
(4) A squares
-
(4) C rectangles
-
(1) E square
Arrange and sew the pieces together following the layout diagram. Pay close attention to the pressing arrows shown in the pattern, as proper pressing helps reduce bulk and ensures accurate alignment in later steps.
Step 2: Complete the Full Block
Using the remaining cut pieces (A, B, C, and D), continue assembling the block around the completed center unit. The construction progresses outward in clearly defined stages, creating a balanced frame around the center.
-
Follow the diagrams carefully for placement.
-
Press seams in the direction indicated to maintain clean intersections.
-
Check measurements as you go to keep the block square.
Once all pieces are assembled, the block should measure:
Tips for Success
-
Use consistent seam allowances throughout the block.
-
Press seams as directed rather than open unless otherwise preferred.
-
Consider using contrasting fabrics for pieces A and B to highlight the block’s structure.
-
This block looks especially striking in coordinated solids, grunge-style fabrics, or soft farmhouse color palettes.
How to Use the Mother Hen Block
The Mother Hen block works beautifully in:
-
Sampler quilts
-
Charity and awareness quilts
-
Farm-inspired or traditional quilt layouts
-
Standalone wall blocks or table toppers
Repeating this block across a quilt creates a rhythmic, cozy pattern that feels timeless and inviting.
Free PDF here!
Access the PDF tutorial here
Once your block is complete, don’t forget to share your work and quilting progress online and connect with other quilters who love this design.