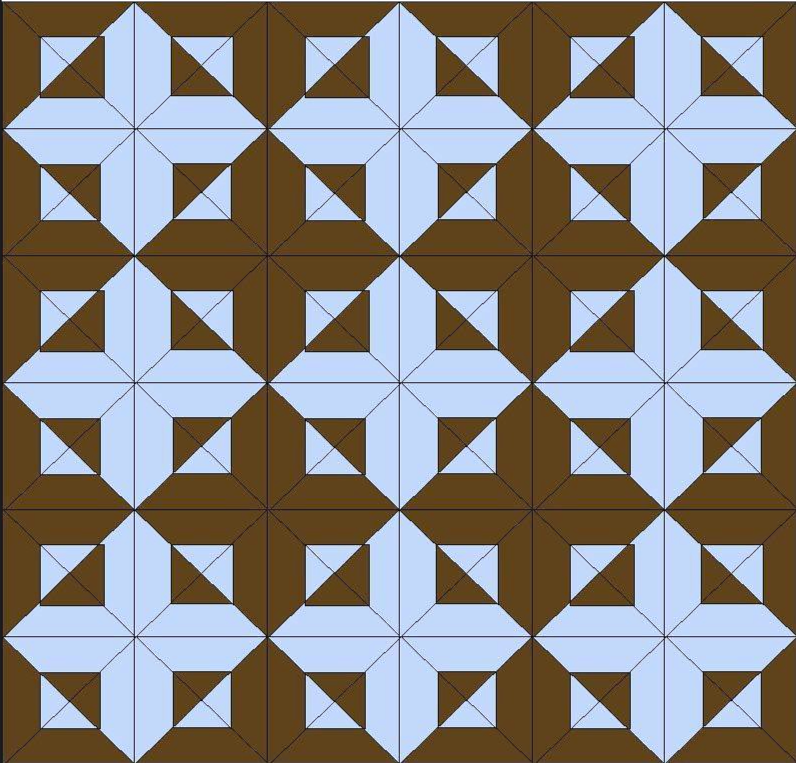
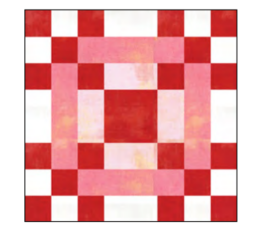
If you love classic quilting with a touch of modern simplicity, you’ll fall in love with the Repeating Cross Quilt Block. This block is a visual delight bold, balanced, and beautifully geometric. Its name comes from the way the crosses seem to repeat endlessly across the quilt, forming an elegant pattern that looks far more complex than it actually is.
This design is perfect for quilters who enjoy strong contrast and visual rhythm. Because each block naturally connects to the next, you don’t need to add any sashing the blocks interlock seamlessly, creating an eye-catching quilt top with wonderful movement and symmetry. It’s a great choice whether you’re making a wall hanging, a throw, or a full-size bed quilt.
One of the best parts about this block is how accessible it is. With just two contrasting fabrics one light and one dark and a simple triangle ruler, you can create a stunning quilt with depth and personality. The repeating cross motif gives you endless opportunities to play with color placement and value, allowing you to create anything from a minimalist monochrome quilt to a vibrant patchwork of glowing crosses.
Repeating Cross Quilt Block Tutorial
🧵 Materials You’ll Need
Light fabric: 2 strips, each 2” × 45”
Dark fabric: 2 strips, each 2” × 45”
Triangle ruler: 3½” from top to bottom (e.g., Fons & Porter Half-Square Triangle ruler)
Rotary cutter and mat
Sewing machine
Iron and ironing board
Marking tape for ruler alignment
Pins or clips
🪡 Finished Block Size: 12½” × 12½” 🧶 Quilt Top Size: 25 blocks = approximately 60″ × 60″
🔹 Step 1: Cut Your Strips
Start by cutting two 2-inch-wide strips of your light fabric and two 2-inch-wide strips of your dark fabric, each 45 inches long. Pair one light and one dark strip together with right sides facing. You’ll use these sets to create the entire block.
🔹 Step 2: Sew and Press
Sew each light and dark strip together along one long edge using a ¼” seam allowance. Press the seams toward the darker fabric to prevent shadowing through the light fabric. Once pressed, you’ll have two strip sets ready to subcut.
🔹 Step 3: Cut Triangles
Align your triangle ruler so the bottom edge of the strip set sits on the 3½” mark of your ruler (use a piece of marking tape for accuracy). Cut along both sides of the ruler to create triangle units. Flip your ruler with each cut (alternating directions) so you make consistent mirror-image triangles from the same strip set.
You’ll end up with two piles:
Pile 1: Dark on bottom, light on top
Pile 2: Light on bottom, dark on top
Keep these piles separate to avoid confusion.
🔹 Step 4: Sew Triangle Units
Take your first pile (dark bottom, light top). Place two triangles right sides together and sew along the long edge to form a diamond shape. Continue sewing all triangles in that pile using a chain-piecing method. Press the seams open or to one side, keeping them flat.
Repeat the same for the second pile (light bottom, dark top). Now you’ll have two sets of sewn diamond units.
🔹 Step 5: Join Diamond Sets
Next, sew one light-center unit and one dark-center unit together along one matching edge. Make sure the seams meet perfectly — pin carefully at every intersection for crisp alignment. After sewing, press the seams flat and trim any small overhangs.
You’ll now have a small square with four intersecting seams.
🔹 Step 6: Assemble the Cross Block
Each block is made of four sewn diamond units. Arrange them so the dark fabrics form a cross in the center. Double-check your layout before sewing.
Sew two units together to make the top row and two units for the bottom row. Then, join both rows together. Press all seams flat and open up your finished Repeating Cross Block — it should measure 12½” × 12½”.
🌈 Color & Fabric Suggestions
This block works best with high contrast fabrics — think navy and white, charcoal and cream, or deep burgundy with linen. For a scrappier look, alternate multiple light and dark prints across your blocks. Tone-on-tone batiks or subtle modern solids also enhance the cross effect beautifully.
🪶 Where to Use This Block
Full-size quilts with interlocking crosses (no sashing needed)
Baby quilts or wall hangings with alternating colors
Table runners using 3 or 4 blocks in a row
💡 Final Tip
After sewing, clip any bulky seam intersections slightly (without cutting into your stitches) to help your block lie perfectly flat. Press well with steam for crisp, sharp corners.
Video Tutorial:
The Repeating Cross Quilt Block is a beginner-friendly design that delivers a professional, geometric look. Its interlocking layout creates a visual rhythm that keeps the eye moving across the quilt. Once you’ve mastered the technique, making an entire quilt top from just 25 blocks will feel quick and rewarding.