Chained Star Block Pattern

Quilting is not just a craft; it’s an art form that allows individuals to express their creativity through fabric, patterns, and stitches. Among the plethora of quilt block patterns available, one that stands out for its elegance and intricacy is the Chained Star Block pattern. In this article, we’ll delve into the beauty and complexity of this mesmerizing pattern, offering insights and tips for quilters looking to master it.

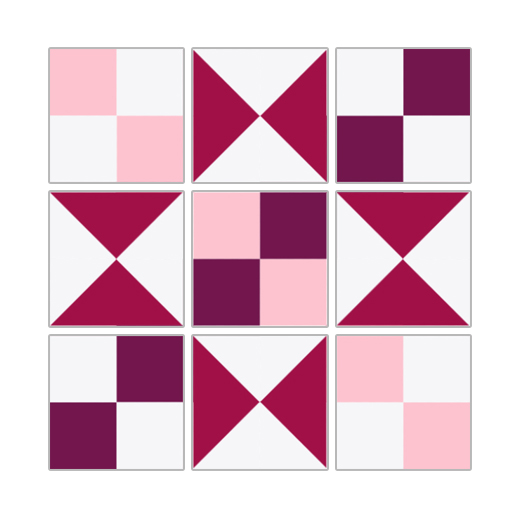
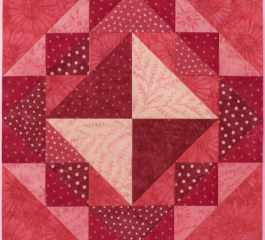
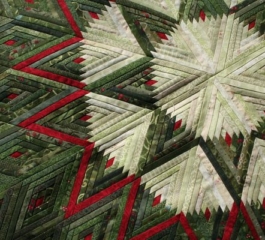
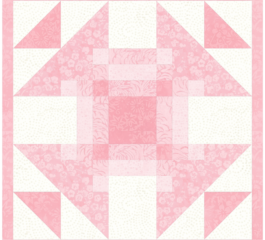
Understanding the Chained Star Block Pattern: The Chained Star Block pattern is characterized by its striking star shape, intricately woven with chains of smaller blocks. The central star typically serves as the focal point, surrounded by a series of interconnecting blocks that create a sense of movement and depth within the quilt.

Creating the Chained Star Block: To begin crafting a Chained Star Block, quilters will need to select fabrics that complement each other and suit the desired aesthetic of the quilt. Traditionally, this pattern utilizes a combination of light, medium, and dark fabrics to achieve contrast and visual interest.

Chained Star Block Pattern

Cutting the Fabrics: To create the Chained Star Block, precise cutting is essential. Here’s a breakdown of the fabric pieces needed:

From solid WHITE:

  • 2 – 5.5″ squares
  • 8 – 2.5″ squares

From solid BABY PINK:

  • 6 – 2.5″ squares

From solid BERRY:

  • 6 – 2.5″ squares

From solid SANGRIA:

  • 2 – 5.5″ squares

Assembling the Block:

Start by marking a diagonal line on the wrong side of one WHITE 5.5″ square. Layer it atop one SANGRIA 5.5″ square and sew together with two seams, stitching 1/4″ on each side of the drawn line. Cut the pair apart on the drawn line and press open to create 2 half-square triangle patches. Repeat this process to make a total of 4 half-square triangle patches.

Chained Star Block Pattern
Diagram1

Next, mark a diagonal line perpendicular to the seam line on the wrong side of each half-square triangle patch.

Match two half-square triangle patches, right sides together, and rotate one patch 180 degrees. Sew 1/4″ from each side of the drawn line, cut apart, and press open to create two hourglass units. Repeat to make a total of 4 hourglass units.

Chained Star Block Pattern
Diagram 2

Using four BABY PINK 2.5″ squares and four WHITE 2.5″ squares, sew together two Four Patch units.

Repeat step 2 using four BERRY 2.5″ squares and four WHITE 2.5″ squares to create two additional Four Patch units.

With the remaining two BABY PINK 2.5″ squares and two BERRY 2.5″ squares, sew together a Four Patch unit.

Diagram 3

Lay out the four Hourglass units and five Four Patch units according to the provided diagram.

Diagram 4

Sew the units into three rows, pressing seam allowances toward the Four Patch units.

Diagram 5

Finally, sew the three rows together to complete the Chained Star Block.

Tips for Success:

  • Prioritize precision cutting to ensure accurate piecing.
  • Maintain consistent seam allowances throughout the assembly process.
  • Press seams carefully to achieve flat, smooth blocks.
  • Take your time when laying out the units to ensure the Chained Star Block takes shape as intended.
  • Embrace patience and practice to master this intricate pattern.

Incorporating the Chained Star Block: Quilters can showcase their mastery of the Chained Star Block pattern by incorporating it into various quilt projects. Whether used as a standalone block or combined with other patterns, this design adds sophistication and visual appeal to quilts, making them cherished heirlooms or thoughtful gifts.

The Chained Star Block pattern exemplifies the artistry and complexity of quilting. With attention to detail, patience, and practice, quilters can master this captivating design, creating stunning works of art that showcase their skill and creativity. Dive into the world of the Chained Star Block pattern and unlock endless possibilities for quilting excellence.

1 Comment

  1. We’re a group of volunteers and opening a new scheme in our community. Your website provided us with valuable info to work on. You’ve done an impressive job and our entire group can be thankful to you.

Leave a Reply

Your email address will not be published. Required fields are marked *