Stitch Markers: 4
Scissors*
Yarn Needle*
Buttons: 4 (optional for decoration)
*Items marked with an asterisk can be found in most craft stores or online (check Etsy for cute stitch markers!).
📌 Notes
-
Pattern uses US terminology.
-
Ch 3 at beginning of each round counts as a stitch.
-
On each round, the last corner is made with (ch 1, sc) instead of the usual ch 2.
🔡 Abbreviations
🧺 Pattern Instructions
✨ The Base:
Ch 5, join with a sl st to form a ring. (Or use the magic ring method.)
Round 1 (Color A):
Ch 3, work into the ring: 3 dc, (ch 2, 4 dc) three times. End with ch 1, sc into 3rd ch of beg ch.
→ (16 dc, 4 corner spaces)
Round 2:
Ch 3, dc into the space below sc, dc in each st across, in next ch-2 space work (2 dc, ch 2, 2 dc); repeat from * to * 3 more times. End with 2 dc in last corner space, ch 1, sc into 3rd ch of beginning ch.
→ (32 dc)
Rounds 3 to 9: Repeat Round 2
(You will increase by 16 stitches each round.)
You can stop here or continue to expand the base depending on your desired size.
👜 The Sides:
Round 10 (Add corners to start forming the bag shape):
Count the stitches on one side and divide by 2.
Example: After 9 rounds, each side has 36 stitches. Place a stitch marker between the 18th and 19th dc. Repeat for all 4 sides.
Now work the round as follows:
Ch 3, dc in the space below the sc, dc in next 15 sts, dc2tog in next 2 sts, skip next 2 sts (either side of marker), dc2tog in next 2 sts, dc in next 15 sts, in next ch-2 space work (2 dc, ch 2, 2 dc); repeat from * to * 3 times. End with 2 dc in final corner space, ch 1, sc in 3rd ch of beginning ch 3.
Rounds 11 to 16 (Color B): Repeat Round 10
Rounds 17 to 22 (Color C): Repeat Round 10
🧵 Finishing Edge (Round 23)
Ch 1, sc in each st around. In each ch-2 corner space, work 3 sc.
Fasten off and weave in all yarn ends.
🎒 The Handles
You can attach store-bought handles or make your own crocheted ones like below:
Row 1 (Color A):
Ch 91, sk 1, sc in each ch to end (90 sc). Fasten off.
Row 2 (Color C):
Attach yarn in first st, ch 1, sc across. Fasten off.
Row 3 (Color B):
Repeat Row 2. Fasten off. Weave in ends.
To Attach:
Thread handle ends through corner spaces of the bag. Fold about 1 inch and stitch in place securely.
🎀 Optional Embellishments
You can sew buttons onto the top edge of the bag for a decorative touch. Next time, consider experimenting with Tunisian crochet handles for extra flair!
And don’t forget I’ll be making the PDF version of this pattern available at the end of this post for easy reference and printing.
📄 Download Chevron Bag Croche Pattern.
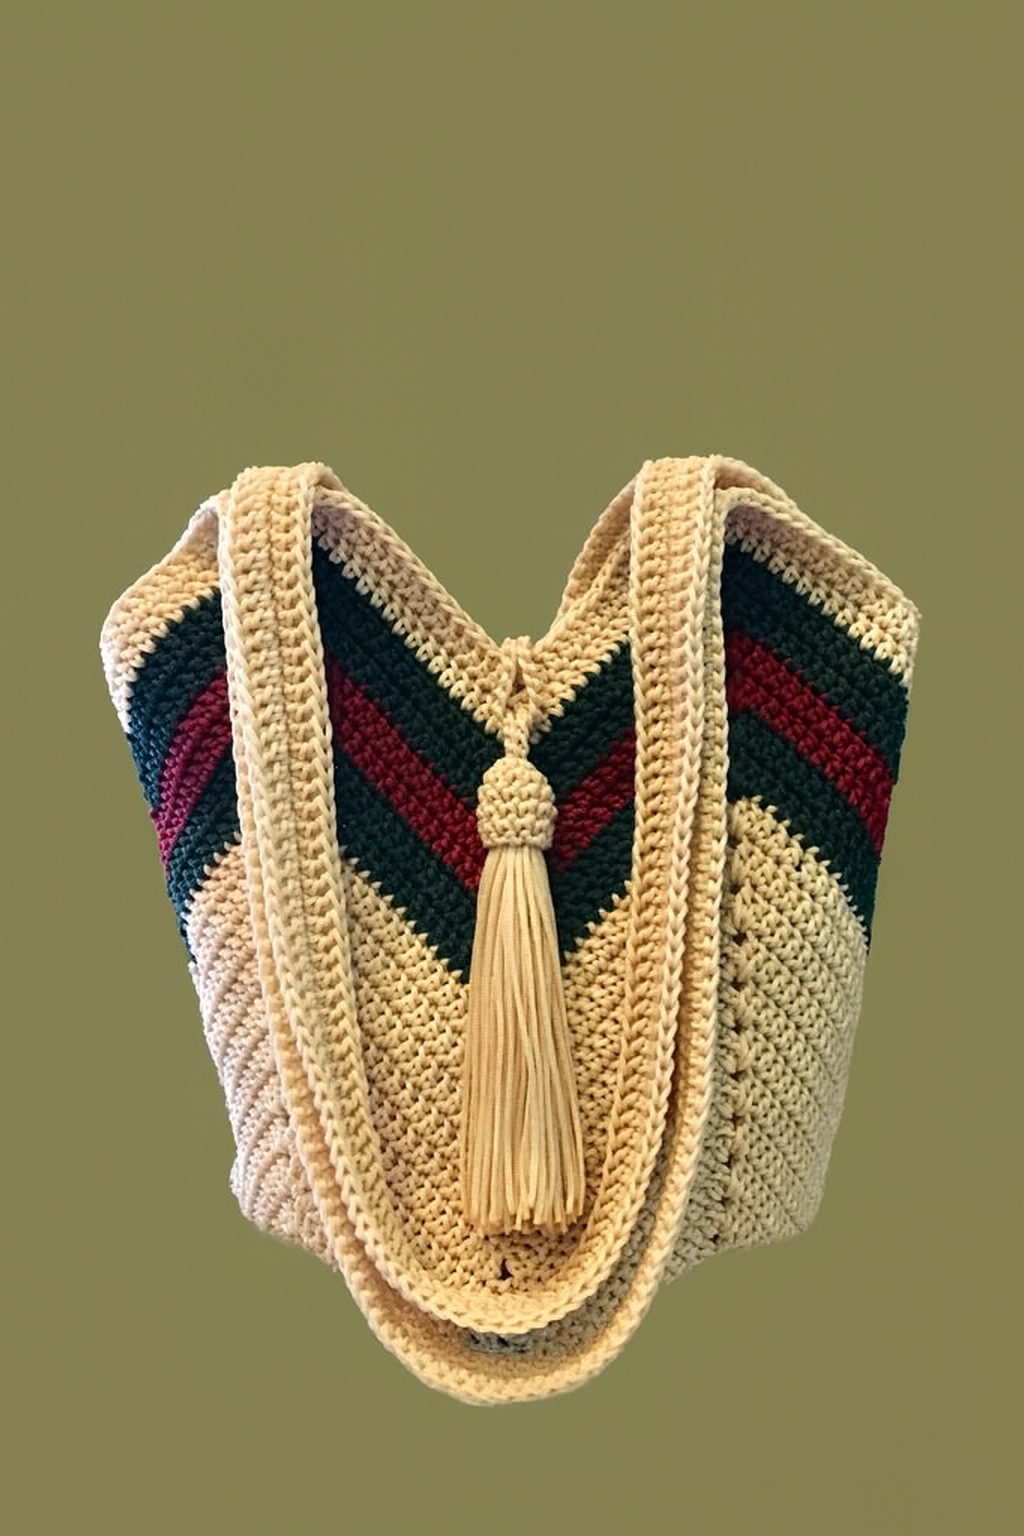
This chevron crochet bag is a perfect blend of ease and elegance. It’s an ideal project to show off your color combinations and makes a great handmade gift. Whether you keep it for yourself or give it away, you’ll be proud of the stylish result!
Stay creative and happy crocheting! 💛
