Crochet Beach Bag Free Pattern

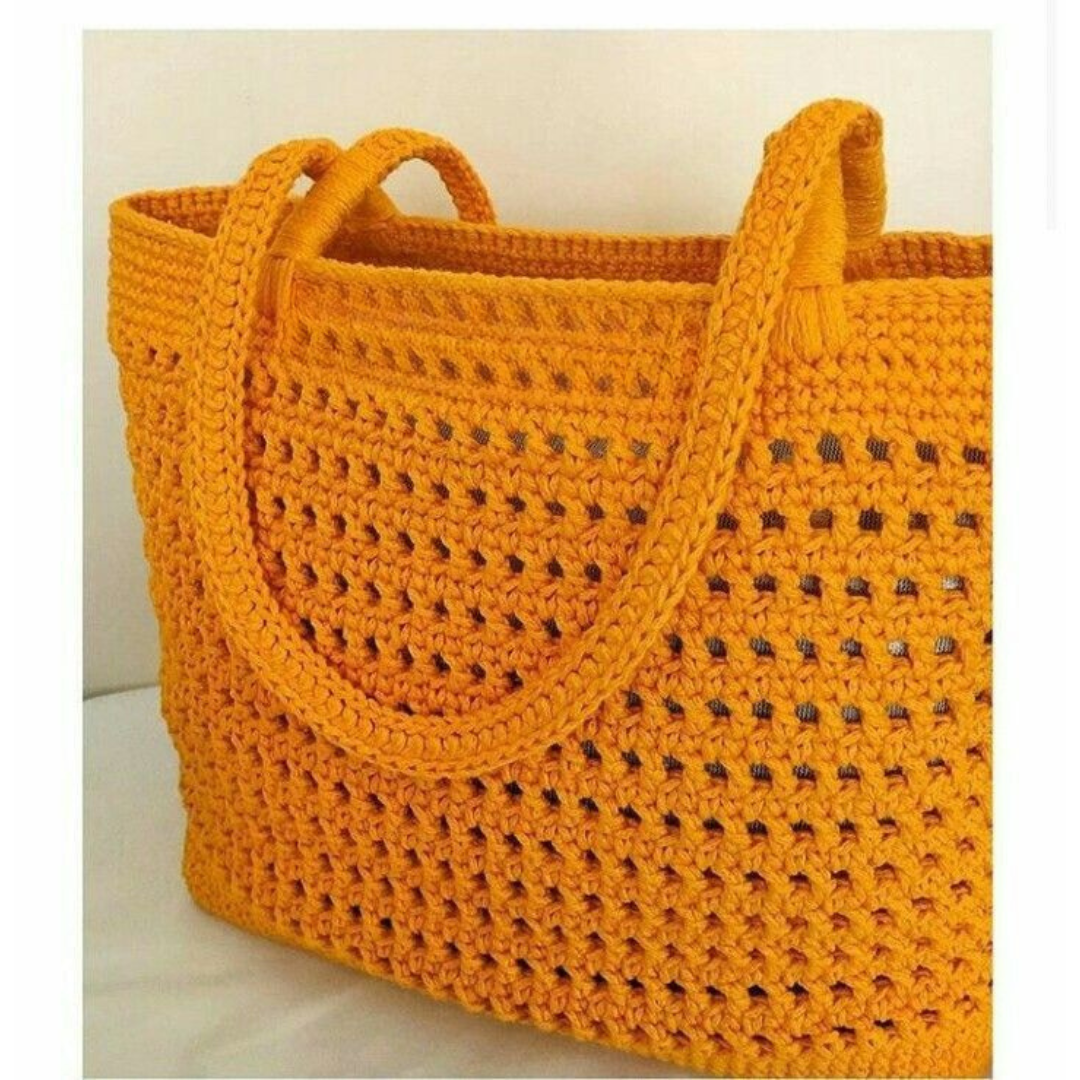
If you’re looking for a modern, sturdy, and spacious beach bag, this is the perfect project! Made with nautical yarn, this bag offers excellent structure and style. It’s ideal for carrying everything you need for a sunny day out, and it’s beginner-friendly.

Handmade bags are not only a practical accessory but also a beautiful expression of creativity. When it comes to beach days, having a spacious, stylish, and sturdy bag makes all the difference and crocheting your own adds a personal touch that store-bought bags simply can’t match. With its clean shape and modern look, this crochet beach bag is both functional and fashionable.

This project is ideal for beginners who want to try working with nautical yarn, as well as experienced crocheters looking for a quick and rewarding make. The use of basic stitches, clean finishing, and the repetition of mesh and single crochet rows make it a soothing and satisfying piece to crochet. Whether you’re planning a summer vacation or just need a roomy tote for everyday use, this beach bag is a fantastic choice.

Crochet Beach Bag Free Pattern

🧶 Materials Needed

  • Nautical Yarn 5 mm (Color: 5247 or your choice) – approximately 600g

  • 5 mm crochet hook

  • Large-eye tapestry needle

  • Scissors

  • Lighter (to seal the ends)

  • Stitch markers

  • Measuring tape

  • 📏 Finished Size

    • Width: 43 cm

    • Height (with base): 40 cm

    • Handle length: customizable (in this sample, ~73 cm)

    🪢 Abbreviations (US Terms)

    • ch = chain

    • sc = single crochet

    • dc = double crochet

    • sl st = slip stitch

    🔸 Bag Base (Oval)

    1. Start with 40 chains (adjust for size).

    2. First Round:

      • Work 3 sc into the second chain from the hook (corner).

      • Place a stitch marker in the first and third sc.

      • Continue with 1 sc in each chain.

      • At the last chain, work 3 sc (second corner), marking the 1st and 3rd again.

      • Continue along the bottom of the chain with 1 sc in each stitch.

    3. Second Round:

      • In the corners (marked stitches), work 2 sc into each stitch to increase.

      • Continue 1 sc in each stitch around.

      • Repeat this process to expand the oval shape.

      • Increase pattern:

        • Round 3: (1 sc, 1 inc) in corners

        • Round 4: (2 sc, 1 inc)

        • … continue until the final increase round uses (8 sc, 1 inc)

    4. The base is complete when it measures around 39 cm in length and 14 cm deep.

    🔹 Body of the Bag

    Step 1: Transition

    • After completing the base, crochet 3 rounds of sc evenly around the entire piece (no increases).

    Step 2: Mesh Pattern (Repeat Section)

    You’ll alternate 1 mesh row and 1 solid row.

    Mesh Row:

    1. Start with 3 ch (counts as dc).

    2. Skip 1 stitch, work 2 dc into next 2 stitches, ch 1, repeat around.

    3. Join with sl st to the top of the beginning ch.

    Solid Row:

    1. Ch 1, work 1 sc into every stitch and chain space across.

    2. Join with sl st to the first sc.

    👉 Repeat these 2 rows until you have 12 mesh rows total.
    The body of the bag will measure approximately 28 cm, and with the base included, 38 cm total height.

    Optional: Lining

    You may prepare a fabric lining by cutting a matching oval base and side panel before attaching the upper edge of the bag. Use American cotton or similar fabric.

    🔸 Upper Edge Finishing

    • After the last mesh and sc rows, add 4 rounds of sc around the top edge.

    • This provides structure and durability.

    🟡 Handles (Make 2)

    1. Chain to reach ~73 cm in length (or your desired handle size).

    2. Work 1 sc into each chain.

    3. At the end, turn and work 1 sc into each stitch on the opposite side of the chain (creating a rounded strap).

    4. Repeat for 3 rows total to create a thick strap.

    🧷 Attaching the Handles

    • Leave a 10 cm gap from the edge of the bag to the start of the handle.

    • Use a yarn needle and the leftover yarn to sew the handles onto the inside edge of the bag.

    • Reinforce with multiple passes for added strength.

    • Weave in the ends neatly on the inside.

    🪡 Optional: Lining Installation

    • Sew the pre-cut base and side panels together on a sewing machine.

    • Insert into the bag and sew along the upper edge by hand or machine.

    This bag has great structure, comfort, and holds its shape beautifully — even without any lining or extra support. It’s the perfect handmade beach accessory!

    You might also be interested

    Crochet Rose Quilt Blanket  Full Tutorial

    Crochet Rose Quilt Blanket Full Tutorial

    Crocheting is a beautiful fusion of creativity and comfort, allowing crafters to transform simple...

    Crocodile Shawl Pattern – Free Crochet Tutorial

    Crocodile Shawl Pattern – Free Crochet Tutorial

    If you’re looking for a crochet project that combines elegance, texture, and a little bit of...

    Chevron Bag Crochet Free Pattern

    Chevron Bag Crochet Free Pattern

    Looking for a beautiful yet beginner-friendly crochet project? The Chevron Bag Crochet Pattern is a...

    Incredible Flower Square Pattern for Afghan

    Incredible Flower Square Pattern for Afghan

    If you love adding floral elements to your crochet projects, the Incredible Flower Square Pattern is...

    You Are Here: