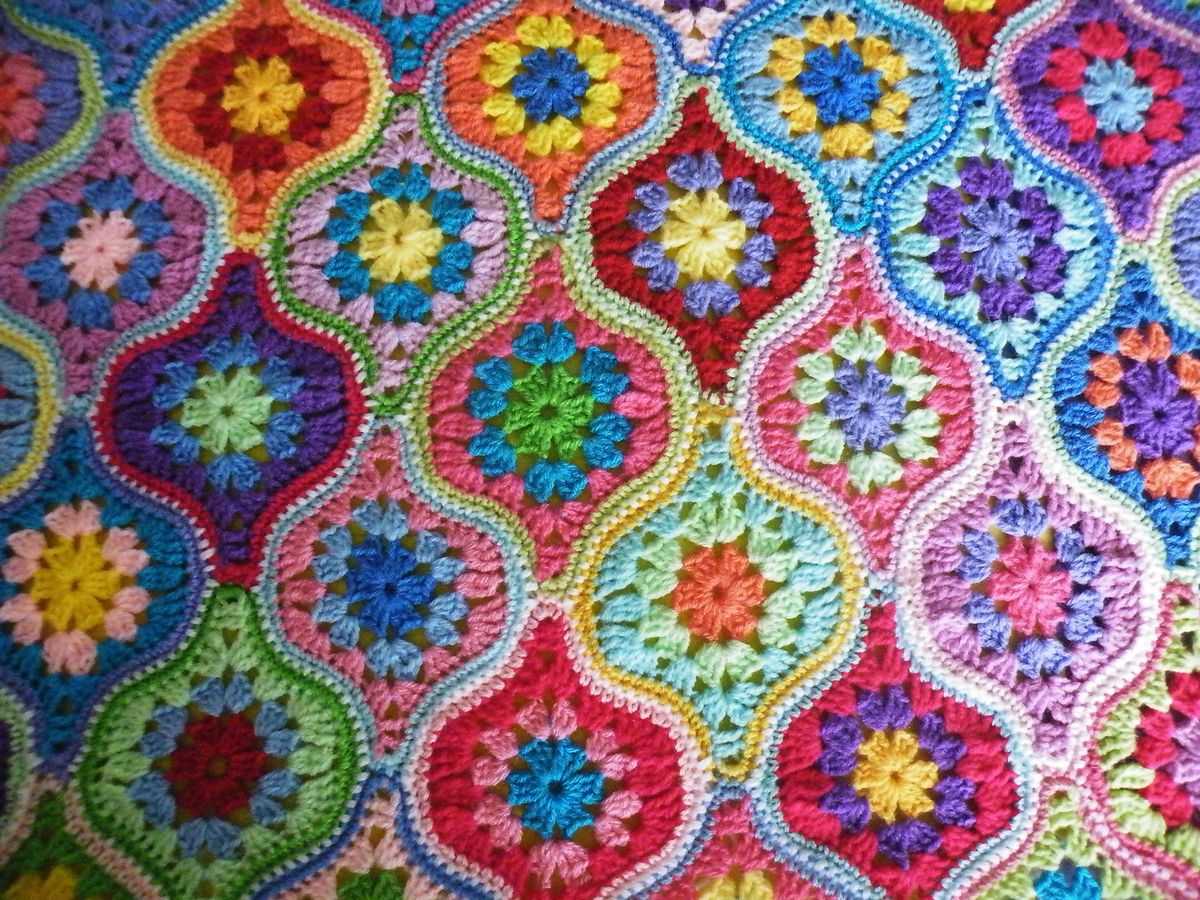
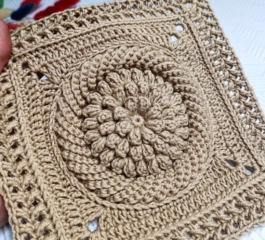
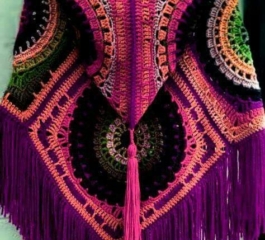
If you’re looking for a crochet project that combines charm, structure, and a touch of mysticism, the Mystical Lantern Granny Pattern is a perfect choice. This beautiful motif brings an elegant twist to traditional granny squares, forming a unique lantern-like shape that works wonderfully in everything from home decor to wearable accessories.
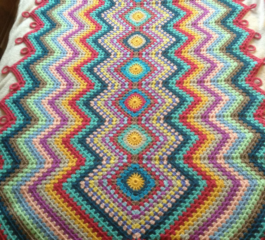
What makes this pattern so special is its balanced blend of texture and symmetry. The layered rounds form soft petal-like curves and intricate borders, ideal for creating eye-catching blankets, table runners, or even hanging lantern garlands. Whether you’re decorating a cozy space or crafting a thoughtful handmade gift, this pattern is sure to impress.
Best of all, it’s beginner-friendly with a relaxing rhythm once you get started. Using just basic stitches like double crochet and chain spaces, along with optional picots for added flair, you can build stunning motifs that join together beautifully. Keep reading for the full step-by-step instructions and start your Mystical Lantern crochet journey today!
Mystical Lantern Granny Pattern
Materials
Crochet yarn in the desired color and weight
Crochet hook suitable for the yarn
Scissors
Abbreviations
ch = chain
sc = single crochet
dc = double crochet
tr = treble crochet
picot = small decorative loop (usually 2 ch, closed with a sc in the first ch)
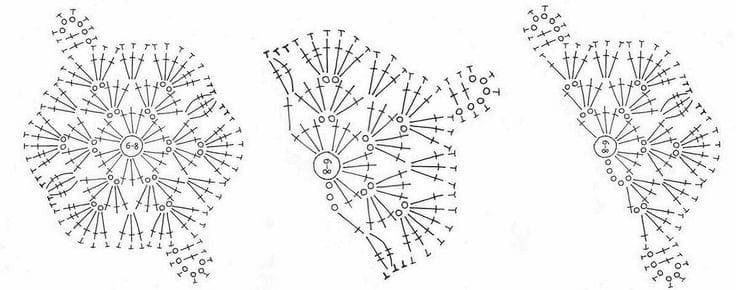
1. Start: Magic Ring
Make a magic ring. Inside the ring, work 8 dc. Pull the ring to close. Join with 1 ch and close the round with a slip stitch.
2. Round 2: Forming Petals
In the space of each dc from the ring, work: 3 dc, 2 ch, 3 dc. You will have 8 petal-like “fan” shapes. Join with a sc at the beginning of the petal and make 1 ch to turn.
3. Round 3: Expanding the Pattern
In each fan: Work (3 dc, 1 ch, 3 dc) in the 2-ch space between the previous round’s fans. Add 1 ch between each fan group. Finish with a sc in the first dc and close the round.
4. Round 4: Picots and Separation
Ch 3 to start the round. Between fans: work 1 dc in each chain space between the fans. At the top of each fan, repeat: (3 dc, 2 ch, 3 dc). Join with a slip stitch.
5. Round 5: Lantern Structure
Start with ch 3. Work 1 dc in each stitch across the row. In the larger 2-ch spaces of the fans, work: (3 dc, 2 ch, 3 dc). Close with a slip stitch.
6. Round 6: Detailing
Ch 3 to begin. Work 1 dc in each stitch, continuing the petal formation. In the fan spaces, replace the 2 ch with a picot. Join with a slip stitch.
7. Round 7 (Final): Decorative Border
Begin with chains, then work “picot + dc” all around for a lacy finish. The usual sequence: 1 dc, then a picot (2 ch, close) on top of the fans. Finish off and weave in ends.
Practical Tips
Use stitch markers to mark the beginning of each round.
Yarn tension affects the final size and shape.
Adjust the number of rounds or the border depending on the intended use (lantern set, placemat, decoration).
Diagram
Video Tutorial:
The Mystical Lantern Granny is more than just a motif it’s a captivating design that brings elegance and versatility to your crochet projects. Whether you use it for blankets, wall hangings, cushion covers, or decorative garlands, this pattern allows your creativity to shine with every stitch.