Second Row:
Work one dc in each stitch (stitch over stitch) without increases.
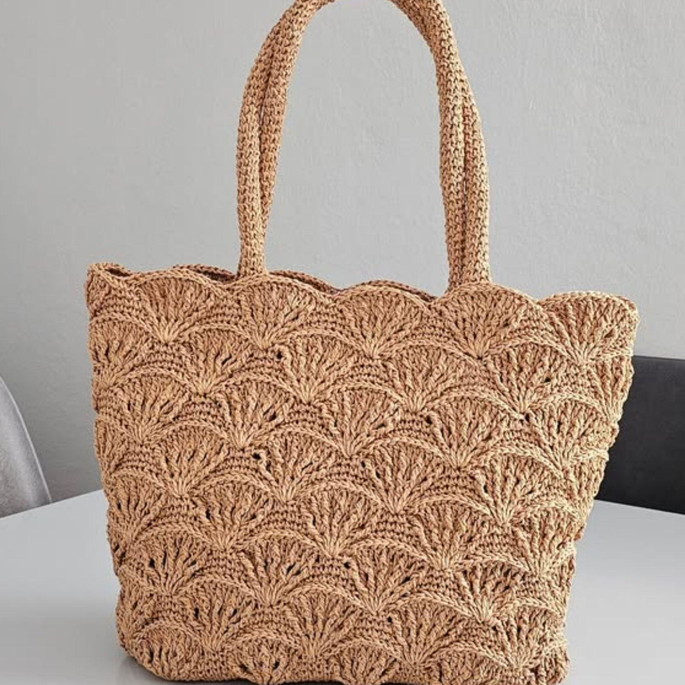
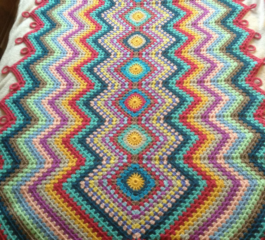
📍 Step 2: Starting the Fan Stitch Pattern (Main Body)
Fan Pattern Setup:
You will create 10 fans total:
→ 1 fan at each top curve
→ 4 fans on each long side
To distribute the fans:
Use stitch markers to count groups of 12 stitches per section for correct fan placement.
Fan Stitch:
Each fan = 5 double crochets in the same stitch
Between each fan: skip 2 stitches, then work 7 dc
Continue this fan + 7 dc repeat around.
📍 Step 3: Building the Texture (Relief Rounds)
After completing the first fan round:
Next Round:
Begin with a front post double crochet (fpdc) on the first stitch of the fan.
Then 1 dc between the stitches, alternating fpdc and dc until the end of the fan (total 9 stitches).
Over the set of 7 dc between fans: skip first and last stitches, work 5 dc in the middle.
Next Round (Widening Fans):
Continue with relief stitches on reliefs, dc between stitches, working each section wider.
After a few rounds, each fan area grows to 13 stitches wide.
Reverse Relief Row:
Work a row of back post double crochets (bpdc) for texture.
Centered Single Crochet:
After each textured section, work a centered single crochet over the middle of the previous row to define placement for the next fan.
📍 Step 4: Repeating the Fan Sequences
From now on, repeat the fan-building sequence (fan rows, then textured relief rows, then centered single crochet row), following the same logic of increasing texture and stitch counts.
Tip:
Work until you have approximately 10 fan rows tall (measuring about 33 cm in height).
📍 Step 5: Creating the Bag Straps
When ready to start handles (after 10 rows tall):
Mark Placement:
The straps should begin and end on the sides where you have fans at the curve tops.
Chain Handles:
On the marked spots, chain 70 chains (about 50 cm) for each handle.
(You can adjust the length as desired for shoulder or hand carry.)
Join Handles:
After making the chains, continue working around the bag to secure them on the opposite side.
Next Round:
Work single crochets across all chain stitches and around the bag body to build handle strength.
Following Rounds:
Repeat a couple more rounds of dc or relief dc, working stitch over stitch, to reinforce the handle area.
📍 Step 6: Final Finishing Rows
After your handles are strong and the desired number of rounds is complete, cut the yarn.
Sew in all ends neatly, using a darning needle.
Finish with a clean invisible stitch method at the seam line.
📍 Step 7: Lining the Bag (Optional but Recommended)
Cutting the Fabric:
Use tricoline fabric or similar.
Cut a rectangle based on your bag’s dimensions (leave extra for seams).
Fold in half, sew the sides with a 1 cm seam allowance.
Boxing the Corners:
Measure 16 cm from the corner seam, fold, and sew across to create depth.
Inserting Lining:
Insert lining inside the bag.
Fold the top edge of the fabric to fit neatly inside the bag.
Sew by hand using an invisible stitch just below the bag’s top edge.
📍 Step 8: Magnetic Button Flap (Optional)
Crochet a small rectangle (6 rows x 6 stitches wide).
Sew the magnetic button onto this flap.
Then sew the flap inside the bag in the central top position.
📍 Step 9: Final Touches
Attach your personalized label and/or decorative tassel.
Weave in any remaining loose threads.
FREE PDF HERE
A beautiful, professional-looking, oversized crochet bag with texture, structure, and a soft lining. Perfect for everyday use or as a standout handmade gift.