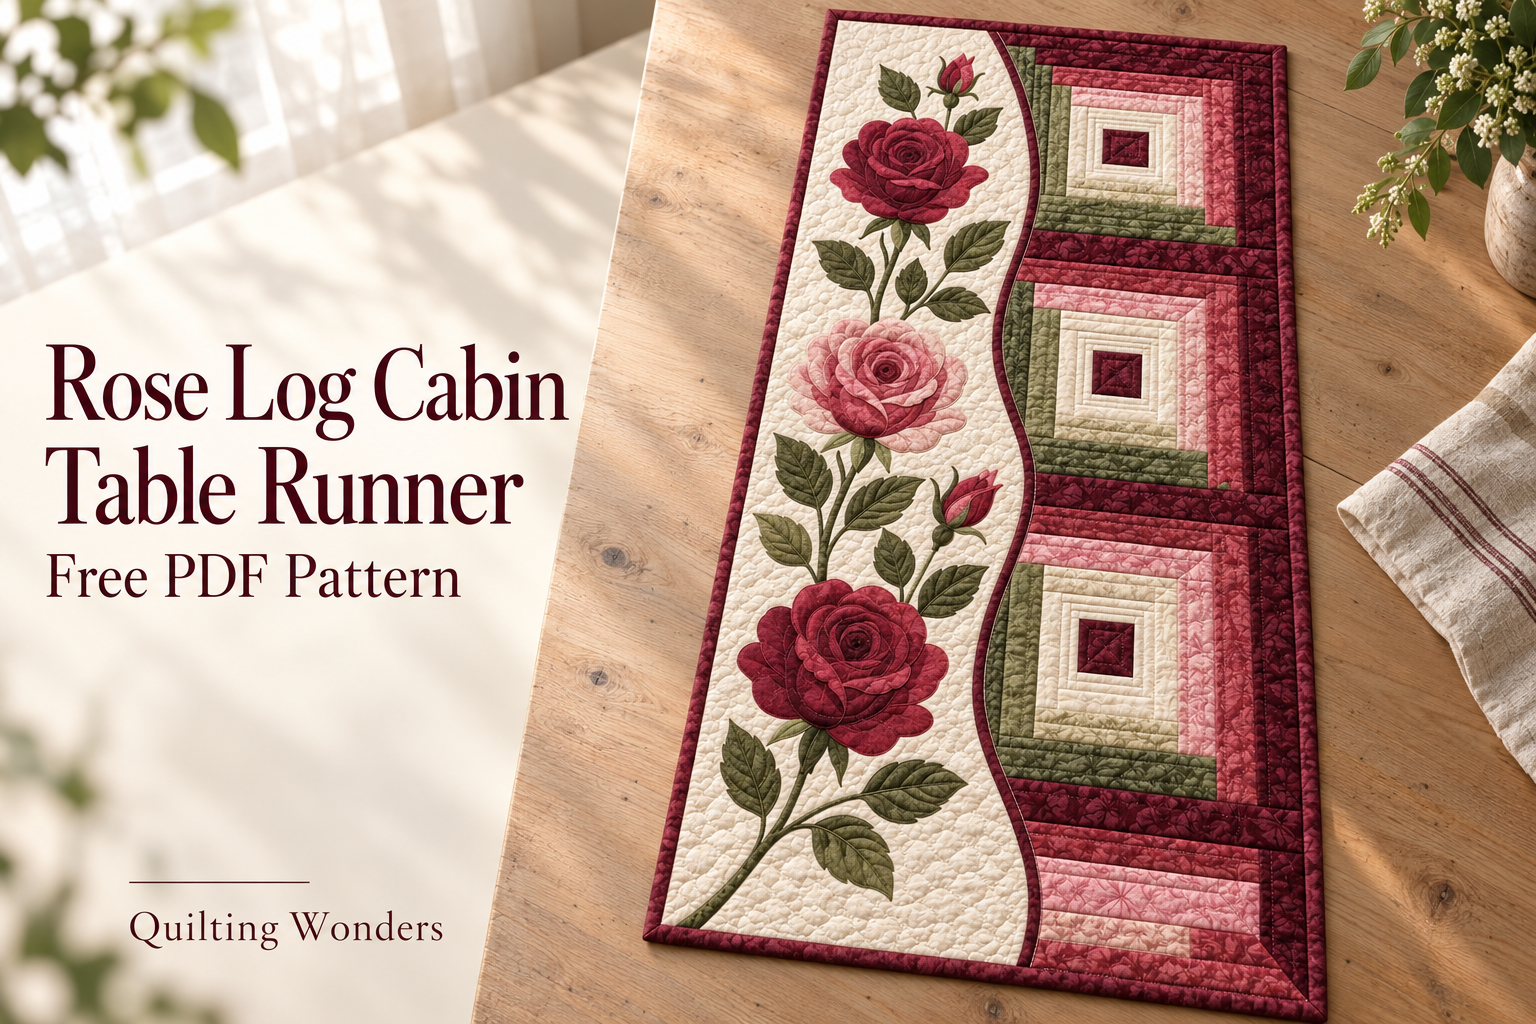
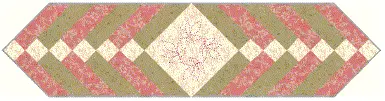
This is an intermediate quilting project. The patchwork uses straight seams, while the appliqué requires accurate tracing, careful layering, and neat edge stitching. The long curve is formed by applying a trimmed patchwork panel onto a continuous background, so you do not need to sew two long curved edges together.
What Makes This Design Special
The two halves create different kinds of movement. On the right, narrow logs draw the eye toward three burgundy centers. On the left, the stems and leaves connect the flowers in a continuous arrangement. Repeating the same burgundy in the flowers, outer logs, curved trim, and binding helps the whole piece feel connected.
The middle rose uses lighter blush fabrics, which gives it a gentle contrast against the two darker flowers. Olive leaves repeat the green sections of the blocks. These small color connections matter: they help the floral appliqué and geometric patchwork look like parts of the same design.
Materials You Will Need
The fabric amounts below assume at least 40 inches of usable width after removing the selvages. A fat quarter should provide at least 18 × 20 inches of usable fabric.
| Material |
Amount |
| Cream background fabric |
1¾ yards |
| Three ivory-to-cream fabrics for the inner logs |
¼ yard of each |
| Three pink fabrics: blush, dusty rose, and deep rose |
¼ yard of each |
| Three greens for the logs: light sage, olive, and deep olive |
¼ yard of each |
| Burgundy for the centers, outer logs, end section, and binding |
1 yard |
| Burgundy rose fabrics in dark, medium, and light values |
1 fat quarter of each |
| Blush rose fabrics in dark, medium, and light values |
1 fat quarter of each |
| Two coordinating greens for the leaves |
2 fat quarters total |
| Backing fabric |
1¾ yards; cut a 28 × 58-inch piece |
| Low-loft batting |
28 × 58 inches |
| Burgundy single-fold bias tape |
60 inches, ⅜-inch finished width |
| Olive single-fold bias tape for stems |
100 inches, ¼-inch finished width |
| Lightweight sewable fusible web |
2 yards, at least 17 inches wide |
The bias tape is additional to the patchwork yardage. You will also need matching thread, an appliqué pressing sheet, a rotary cutter, a quilting ruler, a cutting mat, fabric and paper scissors, an iron, removable marking tools, and your preferred basting supplies.
Choose lightweight quilting cottons for the appliqué so the overlapping petals remain manageable. Reserve all patchwork strips before taking flower pieces from the same fabrics.
Choose Fabrics That Give the Roses Depth
The rose shapes work best when the three fabric values are visibly different. A dark fabric establishes the shadows, a medium fabric supplies the main petal color, and a lighter fabric suggests the turned edges catching the light. A small mottled print can add interest without hiding the petal outlines.
Keep the cream background quiet enough for the flowers to stand out. For the Log Cabin blocks, small floral prints, subtle textures, and tone-on-tone fabrics work well in the narrow logs. Before cutting, place the fabrics beside one another and check whether the ivory, pink, green, and burgundy groups remain easy to distinguish.
Useful Quilting Abbreviations
- WOF: width of fabric, with the selvages removed.
- RST: right sides together.
- FQ: fat quarter.
- Unfinished size: the size of a sewn unit before its outer allowances are used or trimmed.
- Layout size: the nominal size occupied by a unit in the runner diagram.
Use a ¼-inch seam allowance for all patchwork. The PDF’s rotary-cut measurements already include it. The raw-edge appliqué templates do not need added seam allowances.
How to Make the Rose Log Cabin Table Runner
1. Prepare and Label the Pieces
Start by pressing the fabrics and cutting the cream background to 20½ × 50½ inches, lengthwise from the yardage. Set it aside intact.
For the three blocks, cut three 2½-inch burgundy center squares. All 96 logs are cut 1¼ inches wide, giving a finished width of ¾ inch. Their lengths and colors change by round, so use the PDF cutting chart to prepare and label every piece before sewing.
Test your seam allowance with two scrap strips cut 1¼ inches wide. After joining them with a ¼-inch seam and pressing, they should measure 2 inches across. This quick check is especially useful because small differences can accumulate through eight rounds of narrow logs.
2. Sew the Log Cabin Blocks
Begin with a burgundy center square. Add the first log to the top, then continue around the center in this order: top, right, bottom, left. Press after every addition, directing the new seam away from the center.
Repeat that sequence through all eight rounds. The inner rounds are ivory and cream; later rounds introduce pink at the top and right and green at the bottom and left. The final round is burgundy on all four sides.
Each completed block should measure 14½ × 14½ inches. Check the intermediate sizes listed in the PDF as you work. Make three blocks in the same orientation so the colors continue consistently down the runner.
3. Make the Striped End Section
Cut eight bars measuring 1½ × 13¾ inches: two burgundy, two deep rose, two dusty rose, and two blush. Arrange them from top to bottom in this order:
Burgundy → deep rose → dusty rose → blush → blush → dusty rose → deep rose → burgundy.
Join the bars along their long edges with ¼-inch seams and press the seams open. The unit should measure 13¾ × 8½ inches. Add a burgundy rail cut 1¼ × 8½ inches to the right side. The completed end panel should measure 14½ × 8½ inches.
This short striped section continues the color arrangement without adding another full square block.
4. Assemble the Long Patchwork Panel
Join the three Log Cabin blocks vertically, then add the striped section at the bottom. Keep every block facing upward and the narrow end-panel rail on the right. Press the joining seams open to reduce bulk.
The completed column should measure 14½ × 50½ inches. Place it on the cream background with the top, right, and bottom raw edges aligned. The left raw edge of the patchwork will sit 6 inches from the background’s left raw edge.
Mark the 20 × 50-inch target rectangle ¼ inch inside the background’s raw edges. The full-size placement map uses the upper-left corner of that rectangle as its origin.
5. Shape the Curved Division
Print and assemble the full-size placement map, then transfer its curve to the patchwork panel. Remove the panel from the background before cutting. Staystitch ⅛ inch to the right of the marked curve to secure the log seams, then cut directly on the line, removing the patchwork to its left.
Return the shaped panel to the cream background and match the alignment marks. Baste it in place and stitch close to its curved raw edge. Center the ⅜-inch burgundy bias tape over that edge, gently shape it to the wave, and stitch close to both folded edges.
The cream foundation stays beneath the patchwork. This method supports the cut logs while the bias tape provides a clean finish along the curve.
6. Build the Floral Appliqué
Begin with the olive vine and branches, following the centerlines on the full-size map. Shape the ¼-inch bias tape gently and stitch along both long edges. Hide its joins and branch ends beneath leaves, buds, or flowers.
Add the eight large leaves and six small leaves, followed by the two rosebuds. For each rose, prepare one set of the 15 numbered pieces. Make the top and bottom blooms in burgundy shades and the middle bloom in blush.
The separate cutting templates are already reversed for tracing onto fusible paper. Trace them as printed, fuse to the wrong side of the chosen fabrics, and cut on the outlines. Layer each flower from R01 through R15, using the numbered front-view map for placement. Do not reverse the printed cutting templates again.
Follow the fusible manufacturer’s heat and timing instructions. Stitch the exposed appliqué edges with a small blanket stitch or narrow zigzag after arranging and fusing the pieces. For a refresher on template reversal and edge stitching, see Molly and Mama’s appliqué guide.
7. Quilt and Add the Binding
Once the appliqué is complete, layer the top with the batting and backing. Smooth and baste from the center outward, then begin quilting beside the curved trim and along selected patchwork seams to stabilize the two halves.
Echo quilting around the flowers can emphasize their outlines, while leaf veins add detail to the greenery. A small meander suits the cream background; simple straight lines can follow the logs. Keep the overall quilting density balanced and follow the batting manufacturer’s maximum spacing guidance.
Square the quilt within the marked target rectangle, allowing for normal quilting take-up. Join five 2½-inch × WOF burgundy binding strips, press the binding in half lengthwise, and attach it with a ¼-inch seam. Finish the corners with neat miters and secure the folded binding on the back.
Print the Templates at the Correct Scale
The PDF contains 30 pages, including a 12-page placement map and six pages of separate appliqué templates. Print page 13 first and measure the calibration square: it must be exactly 1 × 1 inch.
Select Actual size or 100% and turn off Fit, Shrink, or borderless enlargement. The pages are formatted for US Letter and also fit A4 at 100% without scaling. Follow the tile labels to assemble the map, matching its frame lines and registration marks.
Use the numbered PDF diagrams for cutting and placement. The cover artwork is an illustration of the design, rather than a substitute for the measured templates.
A Floral Accent to Enjoy Through the Seasons
The burgundy, blush, and olive palette gives this runner a warm garden character that works beyond a single holiday. On a small table, the appliqué can become the main decorative feature. On a longer dining table, leaving the roses uncovered allows the patchwork and flowers to be enjoyed from end to end.
Take your time with the narrow logs and the layered petals. Measuring each round, organizing the appliqué pieces, and checking the arrangement before fusing will make the construction easier to follow. The result is a satisfying combination of precise patchwork and expressive floral detail.
Download the Free Rose Log Cabin Table Runner PDF
Ready to begin? The free printable pattern includes the complete cutting charts, numbered Log Cabin diagram, assembly instructions, curved placement map, rose templates, leaves, buds, and finishing guidance.
Print the calibration page first, gather your favorite coordinating fabrics, and make a sample block and rose before starting the complete runner.
Rose Log Cabin Table Runner Pattern + Free PDF
This floral runner also makes a thoughtful gift for a housewarming, anniversary, or someone who enjoys gardening. You can personalize the palette around the recipient’s favorite roses while keeping the contrast between the cream background, flowers, and patchwork blocks. A small fabric label on the back provides space for the year and a short dedication without interrupting the front design. Include a simple care note based on the fabrics, batting, and fusible products you used, so the recipient can look after the finished piece.