Fabric Requirements
- 1¼ yards background fabric
- 1¼ yards navy fabric
- ¾ yard green fabric
- 1 yard blue fabric
- ½ yard binding fabric
- Approximately 4 yards backing fabric
- Batting measuring at least 68″ × 68″
The fabric estimates include a small allowance for trimming and occasional cutting mistakes. If you prefer directional prints, fussy cutting, or extra-generous margins, consider purchasing additional fabric.
Recommended Tools
- Sewing machine
- Rotary cutter
- Self-healing cutting mat
- Quilting rulers
- Fabric marking pencil
- Neutral cotton thread
- Pins or sewing clips
- Iron and pressing surface
- Square ruler for trimming HSTs
- Design wall or another flat layout surface
Fabric Color Key
The pattern uses four contrasting fabric groups:
- W – Background: White, cream, or another light neutral
- D – Dark: Navy, charcoal, or deep purple
- G – Green: Aqua, teal, mint, or green
- B – Blue: Medium blue, turquoise, or a coordinating print
Strong contrast is important. The light background should be noticeably different from the three colored fabrics so that the flower and geometric pathways remain clearly visible.
Cutting Instructions for the 60″ Quilt
The standard quilt uses 3″ finished units.
Whole squares are cut at 3½”. Squares used to make the half-square triangles are cut at 4″ and trimmed after sewing.
Background Fabric
Cut:
- 80 squares measuring 3½” × 3½”
- 28 squares measuring 4″ × 4″
Navy Fabric
Cut:
- 44 squares measuring 3½” × 3½”
- 22 squares measuring 4″ × 4″
- 6 strips measuring 3½” × width of fabric for the borders
Green Fabric
Cut:
- 52 squares measuring 3½” × 3½”
- 16 squares measuring 4″ × 4″
- 4 cornerstones measuring 3½” × 3½”
Blue Fabric
Cut:
- 64 squares measuring 3½” × 3½”
- 18 squares measuring 4″ × 4″
Binding
Cut:
- 7 strips measuring 2½” × width of fabric
The border strips will be pieced as necessary and trimmed to fit the quilt center accurately.
Half-Square Triangle Requirements
The Nana Flower Quilt uses 84 half-square triangle units.
Make:
- 32 background/navy HSTs
- 20 background/blue HSTs
- 16 blue/green HSTs
- 12 navy/green HSTs
- 4 background/green HSTs
Because the two-at-a-time method produces two matching HSTs from each fabric pair, you will sew:
- 16 background/navy pairs
- 10 background/blue pairs
- 8 blue/green pairs
- 6 navy/green pairs
- 2 background/green pairs
How to Make the Half-Square Triangles
- Place two coordinating 4″ squares right sides together.
- Draw a diagonal line from one corner to the opposite corner on the wrong side of the lighter square.
- Sew a quarter-inch seam on both sides of the marked line.
- Cut directly on the marked diagonal line.
- Open the two units and press the seam allowances.
- Trim each HST to exactly 3½” square.
Accurate trimming is essential. When all the units have the same dimensions, the points align more easily and the finished quilt lies flat.
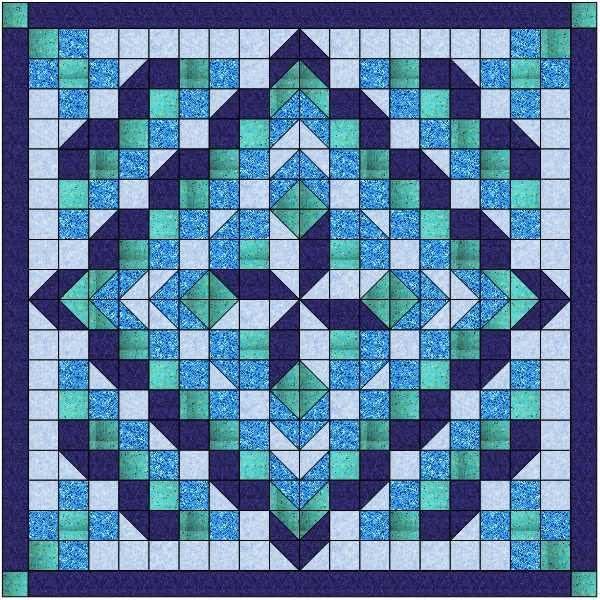
For directional diagrams, keep the printed layout nearby while arranging the HSTs. An HST turned in the wrong direction can interrupt the flower’s outline.
Understanding the Quilt Layout
The center of the quilt is an 18 × 18 grid. Instead of assembling all 324 units at once, the design is divided into four identical 9 × 9 quadrants.
Each quadrant contains 81 units. After the first quadrant is completed, the remaining sections follow the same arrangement but are rotated:
- Upper-left quadrant: original orientation
- Upper-right quadrant: rotated 90 degrees
- Lower-right quadrant: rotated 180 degrees
- Lower-left quadrant: rotated 270 degrees
This rotational construction produces the large central flower and the balanced secondary design.
Assemble the First Quadrant
Use the numbered quadrant chart included in the free PDF.
- Arrange the units for rows 1 through 9 on a design wall or flat surface.
- Check every HST orientation before sewing.
- Sew the units in each row together using an accurate quarter-inch seam allowance.
- Press the seams in alternating directions. For example, press the seams in odd-numbered rows to the right and even-numbered rows to the left.
- Join the completed rows, matching the vertical seams carefully.
- Press the finished quadrant flat.
The completed 9 × 9 quadrant should measure approximately 27½” square unfinished.
Complete the Quilt Center
Make four identical quadrants using the same unit arrangement.
Place the quadrants in their final positions and rotate them according to the complete layout diagram. Before joining them, step back and inspect the design. Check the center flower, exterior points, and directional HSTs.
Join the two upper quadrants. Then join the two lower quadrants. Finally, sew the upper and lower sections together through the center of the quilt.
The completed quilt center should measure approximately 54½” × 54½” unfinished.
Pin carefully at the central intersection so that the four quadrants meet neatly. Press the final center seam in the direction that allows the quilt top to lie flattest.
Add the Borders
Measure the quilt center vertically through the middle. Use that measurement to prepare the left and right border strips.
- Piece the navy width-of-fabric strips if necessary.
- Cut two side border strips measuring approximately 3½” × 54½”, adjusting them to the actual measurement of your quilt center.
- Pin and sew the strips to the left and right sides.
- Press the seams toward the borders.
- Prepare the upper and lower borders with one green 3½” cornerstone at each end.
- Sew the cornerstone units to the border strips.
- Attach the upper and lower borders, matching the cornerstones with the side borders.
After adding the borders, the quilt top should measure approximately 60½” square unfinished and finish at about 60″ × 60″ after binding.
Nana Flower Quilt Pattern
Quilting Suggestions
The strong geometry of the Nana Flower design works beautifully with several quilting styles.
Consider:
- Straight-line quilting through the grid
- Diagonal quilting that follows the HST seams
- Echo quilting around the central flower
- Gentle free-motion curves to soften the angular design
- An all-over floral quilting motif
- Simple crosshatch quilting
For a clean, modern result, quilt a quarter inch away from selected seam lines. This emphasizes the piecing without covering the fabric colors.
Binding and Finishing
Once the quilting is complete:
- Trim the batting and backing even with the quilt top.
- Join the seven binding strips with diagonal seams.
- Press the binding in half lengthwise, wrong sides together.
- Sew the binding to the front of the quilt.
- Fold it over the raw edge and finish it by hand or machine.
- Add a label with the quilt name, maker’s name, location, and completion date.
Make the Pattern in Another Size
The same 18 × 18 layout can be enlarged or reduced by changing the finished size of each unit.
| Finished Unit |
Cut Whole Squares |
HST Starting Squares |
Approximate Finished Quilt |
| 2″ |
2½” |
3″ |
40″ × 40″ |
| 3″ |
3½” |
4″ |
60″ × 60″ |
| 4″ |
4½” |
5″ |
80″ × 80″ |
| 5″ |
5½” |
6″ |
100″ × 100″ |
| 6″ |
6½” |
7″ |
120″ × 120″ |
The listed overall sizes include borders proportionally matched to the unit size. Fabric requirements will change when making a different size, so calculate the yardage before cutting.
Tips for Accurate Results
- Make one test HST before chain piecing all the units.
- Trim every HST to the exact required size.
- Label the rows as soon as they are arranged.
- Photograph each quadrant before sewing.
- Keep the complete color diagram beside your machine.
- Check the orientation of every diagonal seam.
- Measure the quilt center before cutting the borders.
- Press instead of dragging the iron across the units.
- Use a scant quarter-inch seam if your blocks finish slightly small.
Color Ideas for Your Nana Flower Quilt
The original blue, green, navy, and white palette gives the quilt a fresh and peaceful appearance, but the pattern can be adapted to many styles.
Try:
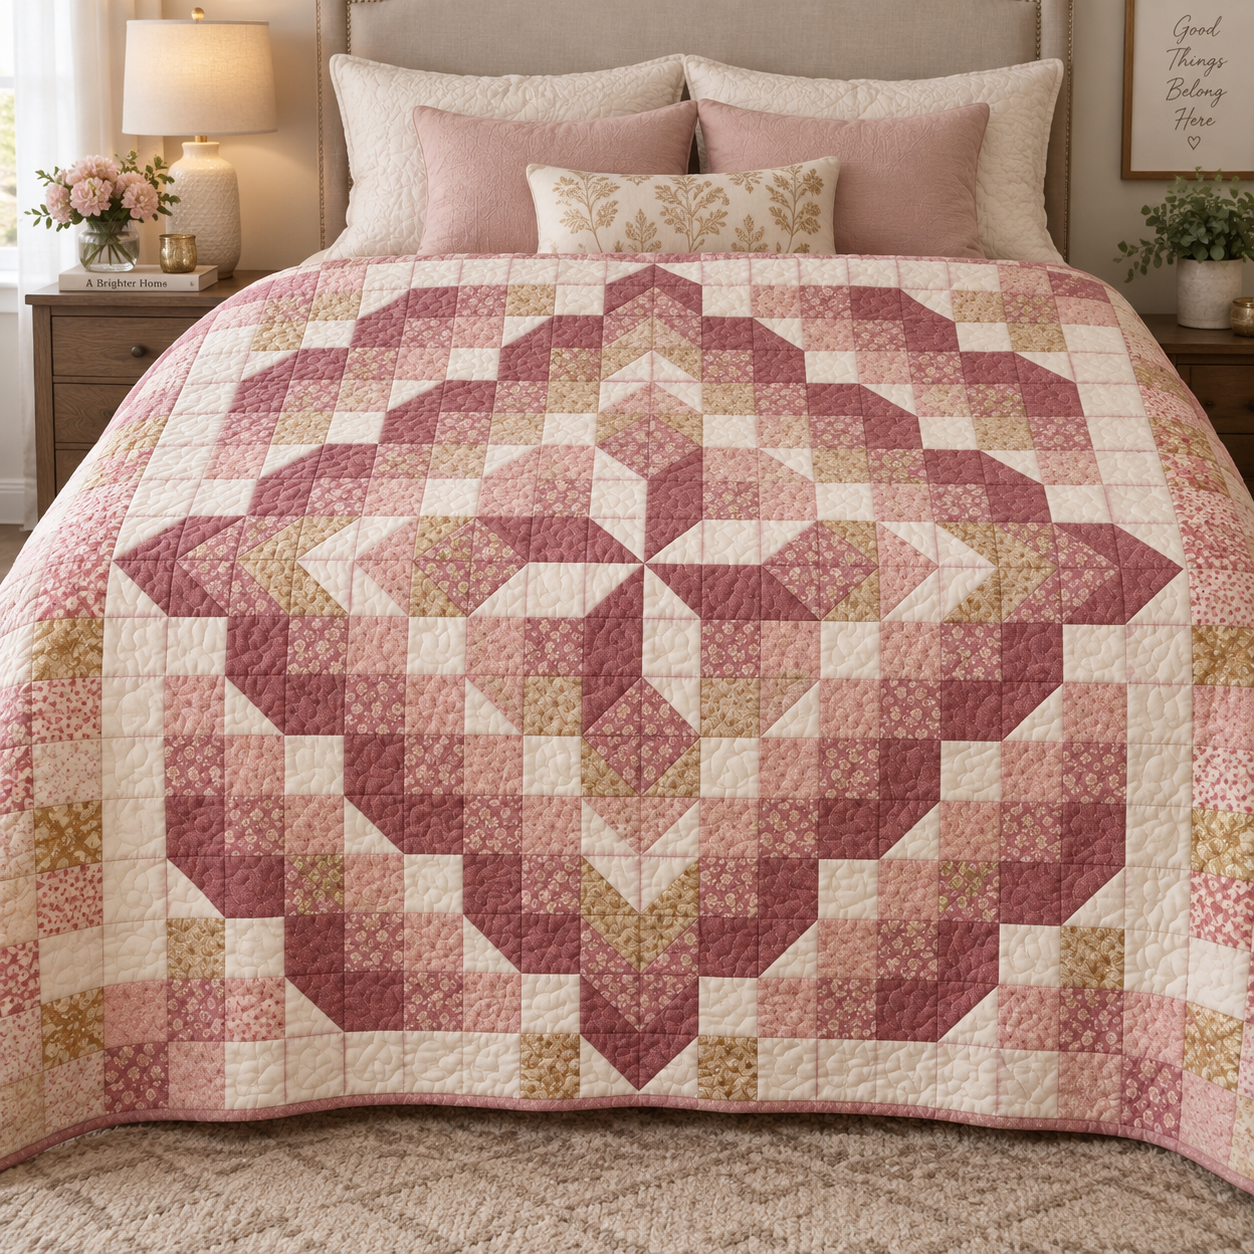
- Burgundy, rose, blush, and cream for a romantic quilt
- Orange, gold, brown, and ivory for an autumn version
- Red, green, white, and charcoal for a holiday quilt
- Scrappy blues and greens for a coastal look
- Black, gray, and white for a modern monochromatic version
- Floral prints with coordinating solids for a traditional finish
A coloring page is included in the PDF so you can test your fabric palette before cutting.
Download the free Nana Flower Quilt Pattern PDF for the complete cutting charts, fabric requirements, HST instructions, quadrant diagrams, full quilt layout, border construction, and printable coloring page.
Nana Flower Quilt Pattern PDF
The Nana Flower Quilt combines traditional patchwork units with a beautifully symmetrical layout. Squares make the construction approachable, while carefully positioned half-square triangles create movement, petals, and secondary geometric shapes.
Take your time when arranging the quadrants, check the HST orientation frequently, and use the full-color diagrams as your guide. Once the four sections are rotated and joined, the complete flower appears almost like magic.